In this tutorial, we look at how to import multiple Excel files into Excel from a folder using Power Query.
It is amazing how simple this process can be with Power Query and modern day Excel. However, it can still come with the odd hiccup.
In this example, I want to import all the Excel files from the folder shown below.

Ideally this folder would contain Excel files ONLY. But when you have teams of people working on a shared area, things happen.
Somehow a PDF file and a JPG (picture of me) have appeared in the folder.
This can create complications with the query we will create to import the Excel files. So we will build in some protection so that the process works seamlessly. Both for now, but also for future imports.
In the future, it will be a case of clicking the Refresh button. And any changed files, or additional files will all be imported again without complication.
Watch the Video
Import Excel Files from a Folder
We begin the process by clicking the Data tab > Get Data button > From File and then From Folder.
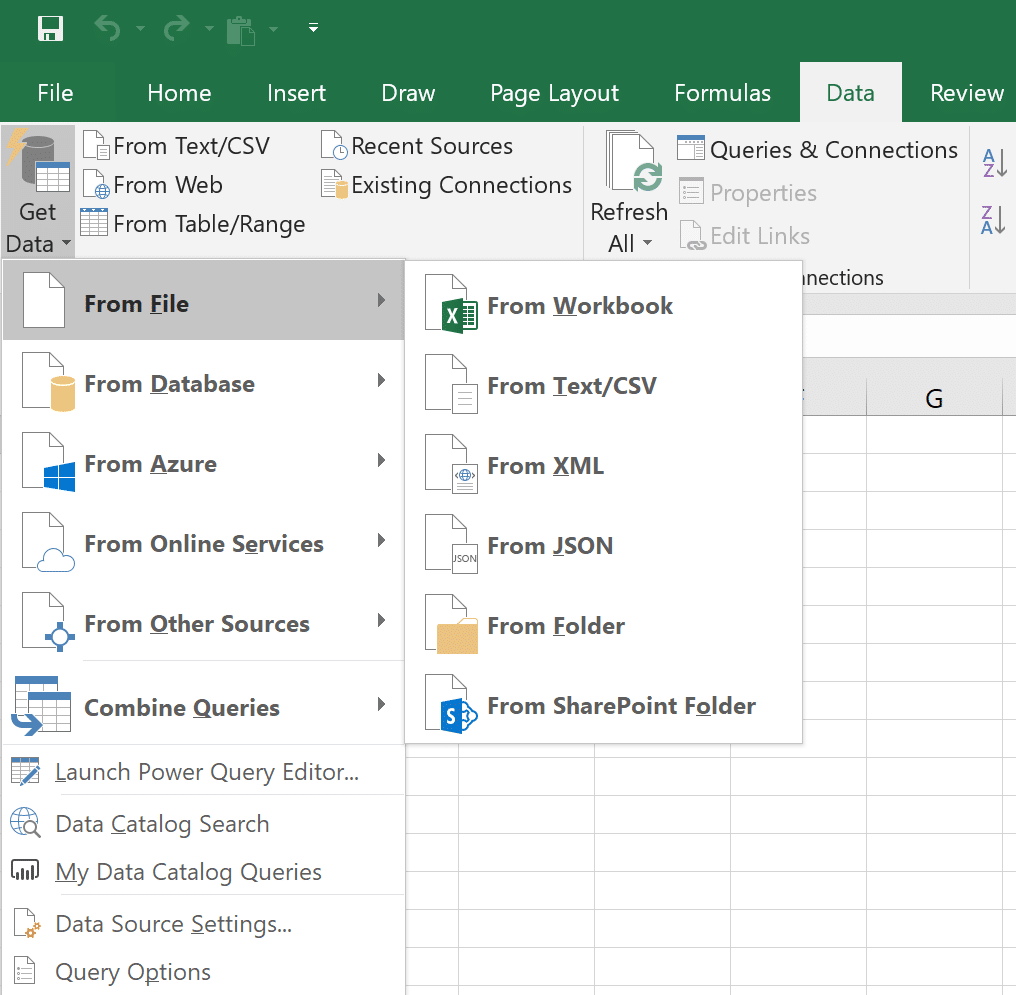
With the regular changes made to Excel, your screen may look slightly different to above.
We will then be asked to browse for the folder to import from. I have selected the reports folder on my Desktop.

A preview window appears showing the files from that folder.
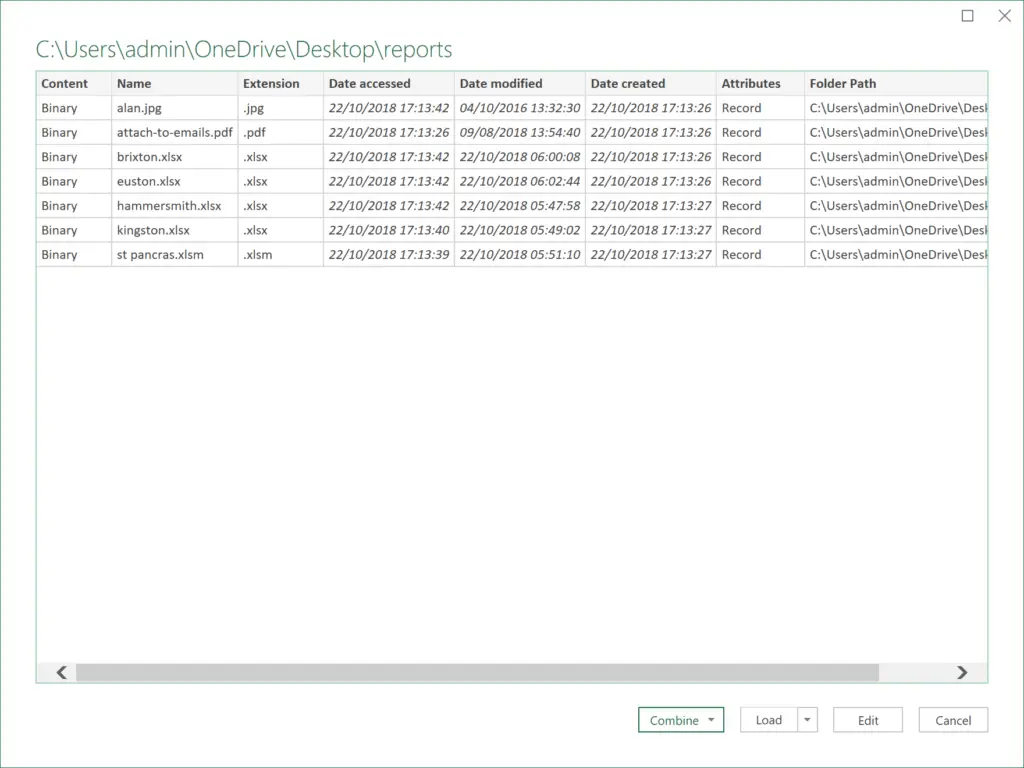
Click Edit to go to the Power Query Editor. We can then make some changes in here to ensure that only the Excel files are imported.
The files are listed in the editor.

A column with the Extension is provided. This is useful for us to exclude the non Excel files.
Click the filter arrow for the Extension column, select Text Filters and Begins With.
We can then enter .xls to ensure only Excel files are used. This folder also includes a .xlsm (macro enabled worksheet). So by using .xls instead of .xlsx we are catering for .xls, .xlsm and .xlsx files.

The PDF and JPG files are filtered out of the list. We can now combine the files and append the data from each one into one Excel file.
Click the Combine Files button (double arrow on the Content column header).

The Combine Files window appears. You will see the sheets of the workbooks here and can preview them. Sheet1 is selected as the sheet that includes the data that we want.
The Skip files with errors box has been checked also. This is important to avoid possible errors affecting the import process.
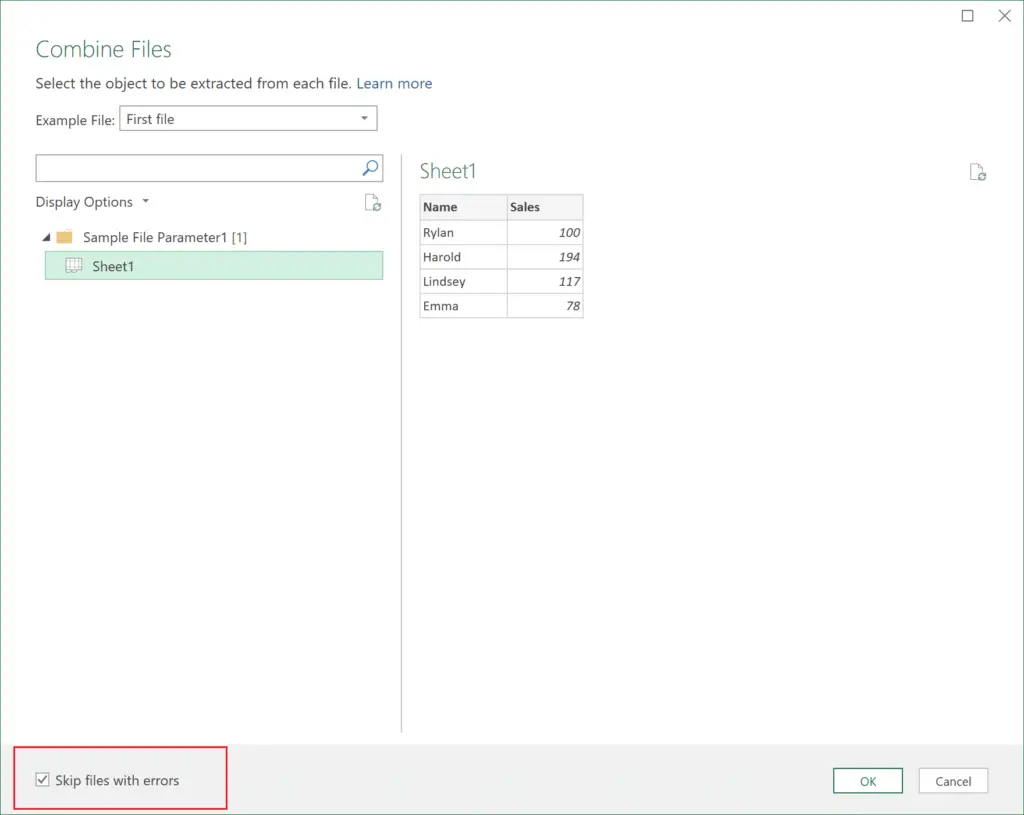
A common error occurs when you try and refresh a connection, but someone has one of the Excel files from that folder open. If you do not check the box to skip errors, your query is interrupted with an error message.
The data from the files is stacked on top of each other into a single list.
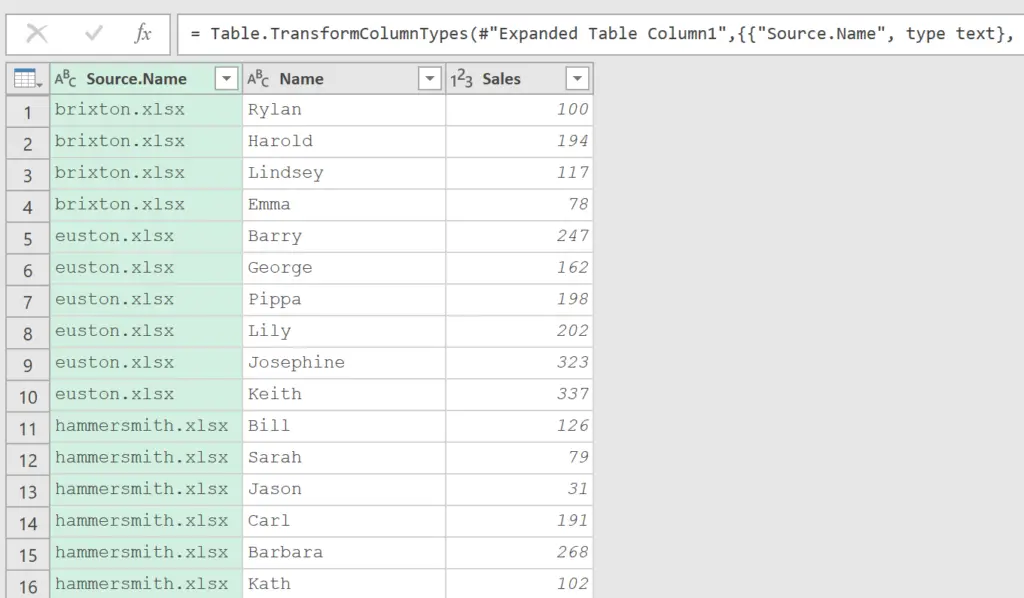
A few more transformations can be done here to make your data look correct.
In the video I split the Source.Name column to separate the extension from the file name. The extension column is then removed. The names converted to capitalise each word. And the column renamed Location to end up with the below.
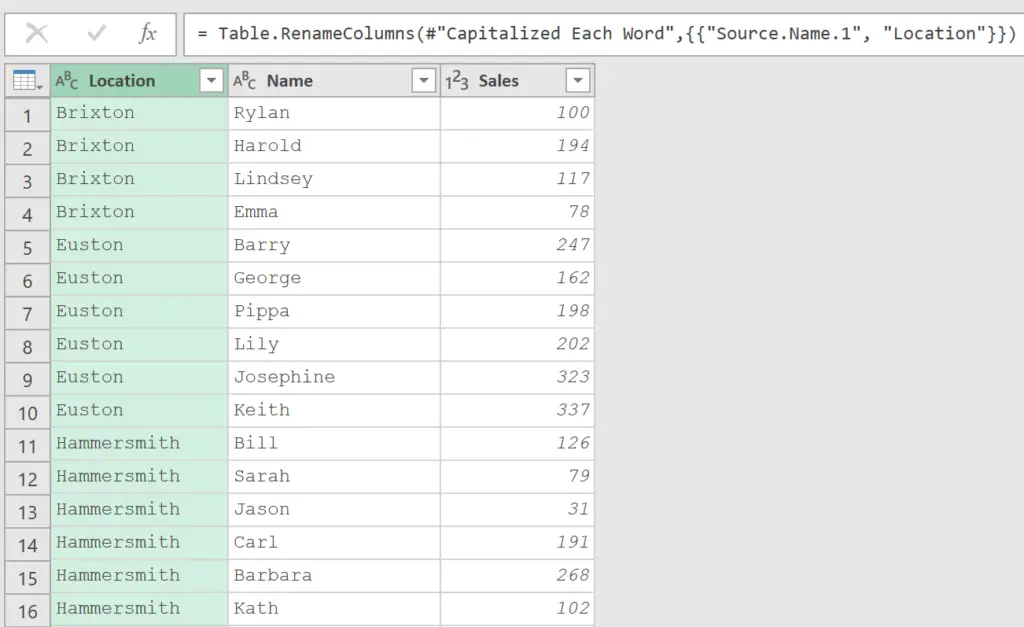
You can then Close and Load the data into a new or existing workbook.
When new files are added, or data changed in those files. You just need to click the Data tab and Refresh to update the connection to that folder, and everything updates.
Superb!



Leave a Reply