This blog post looks at how to group worksheets in Excel, and a couple of reasons why you would want to do that.
This awesome little technique can save tons of time and seriously improve your productivity.
Why would you want to group worksheets?
By grouping worksheets you can make the same change to multiple worksheets at the same time. This can be a formatting change, a structural change such as inserting a row, or even a formula.
Create a Worksheet Group
A group can consist of one or more sheets. Once the sheets are grouped, perform the actions you want on the active sheet and those actions are replicated on the other sheets of the group.
- Click on the first sheet you want in the group, then hold down the Ctrl key and select the other sheets. If the sheet tabs are contiguous you can hold Shift and click the first and last sheets of the group.
- You can now perform whatever actions you want on the grouped sheets. In the video below I demonstrate writing a formula, formatting some cells and also formatting the sheet tabs.
When the sheets of a workbook are grouped, Excel displays [Group] next to the workbook name in the Title bar. This serves as a constant reminder of the grouped status. Some Excel functionality does not work when sheets are grouped.
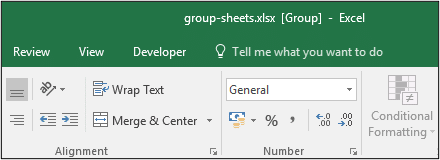
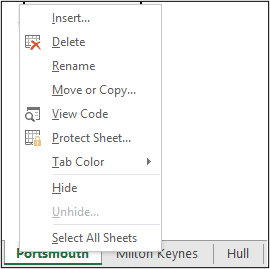
To ungroup the worksheets, either click on any sheet tab that is not in the group, or right mouse click a sheet tab and select Ungroup sheets.
If you want to group all of the sheets of a workbook, right mouse click a sheet tab and select Group All Sheets.
Want to see what grouping worksheets can do for you. Check out the video below.




very good
Thanks Asim
A very nice .. enjoying your work,
thank you
Thank you, Samuel.