This blog post looks at how you can create a looping PowerPoint introduction. This is when a few select slides are set to loop continuously before the main presentation begins.
It provides something for the audience to watch whilst they are gathering in the room. It can be a useful technique for creating a buzz, and setting the expectations for what is to follow.
To do this we will need to create two custom shows. One for the looping introduction, and another containing the main body of the presentation. We will then need to link the two shows so that the presenter can easily exit the loop and begin the presentation when needed.
Create the Intro Slides
The first step (if you have not already done so) is to create the slides that will form the introduction.
I will be using 4 slides for the looping introduction.
I have positioned my intro slides at the end of the presentation so that they do not affect the slide numbering. We will set them to play first despite their position in the slide deck.
Set Timings for the Looping Introduction
Now that we have the slides, we need to set them to change automatically dependent upon timings. For this we need slide transitions.
- Select all of the intro slides.
- Click the Transitions tab on the Ribbon.
- Select a transition effect from the gallery.
- In the Timing group, uncheck the box for On mouse click, and check the After box. Enter a timing for each slide.

Create the Custom Shows
We will now create the two custom shows.
- Click the Slide Show tab on the Ribbon, click Custom Slide Show and then Custom Shows.
- Click the New button.
- Enter Intro for the Slide show name and then select the intro slides in the list on the left and click Add to use them in the show.
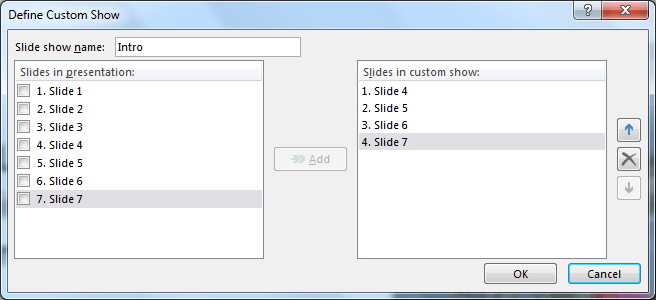
- Click Ok and then repeat steps 2 and 3 for the slides that form the body of the presentation.
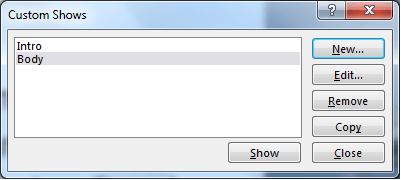
Create a Button to Exit the Intro Loop
We now need a way of exiting the intro loop when it is time to deliver the presentation. For this we can create a shape with an action to begin the Body custom show.
- Select the first intro slide.
- Click the Insert tab and select Shapes.
- Choose the Rectangle shape and click and drag to draw a square/rectangle that covers the whole slide.
- With the shape still selected, click the Action button on the Insert tab.
- Select the Hyperlink to option and select Custom Show from the list.
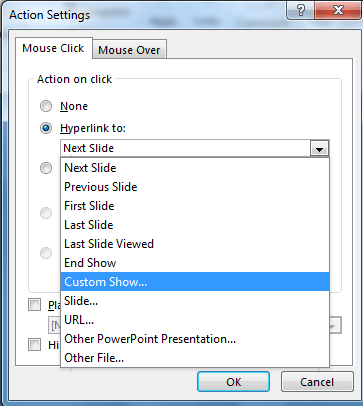
- Select the Body custom show and click Ok.
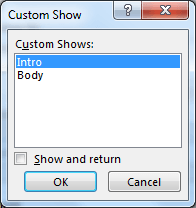
- With the shape still selected, click the Format tab on the Ribbon, click the Shape Fill button and select No Fill.
- Click the Shape Outline button and select No Outline.
- The shape is no transparent and invisible to the audience. Copy and paste the shape onto the other slides of the intro.
Set the Intro Show to Play First and Loop When Finished
The final step is to set the Intro show to play first when the slide show is started from the beginning. We also need to set the intro to loop continuously until the presenter clicks the button we created.
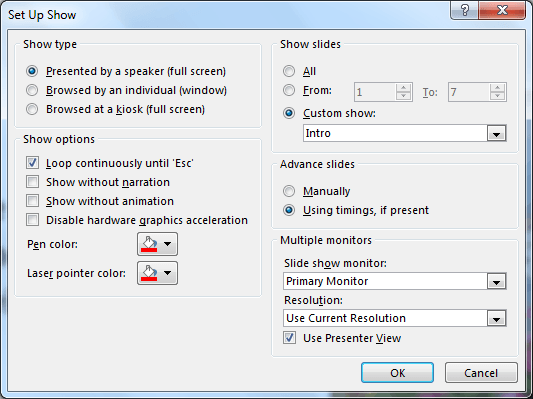
- Click the Slide Show tab and then Set Up Slide Show.
- Select the option for Custom show in the Show slides section of the dialog, and select the Intro show from the list.
- Check the Loop continuously until ‘Esc’ box.


Leave a Reply